Tool Service Configuration
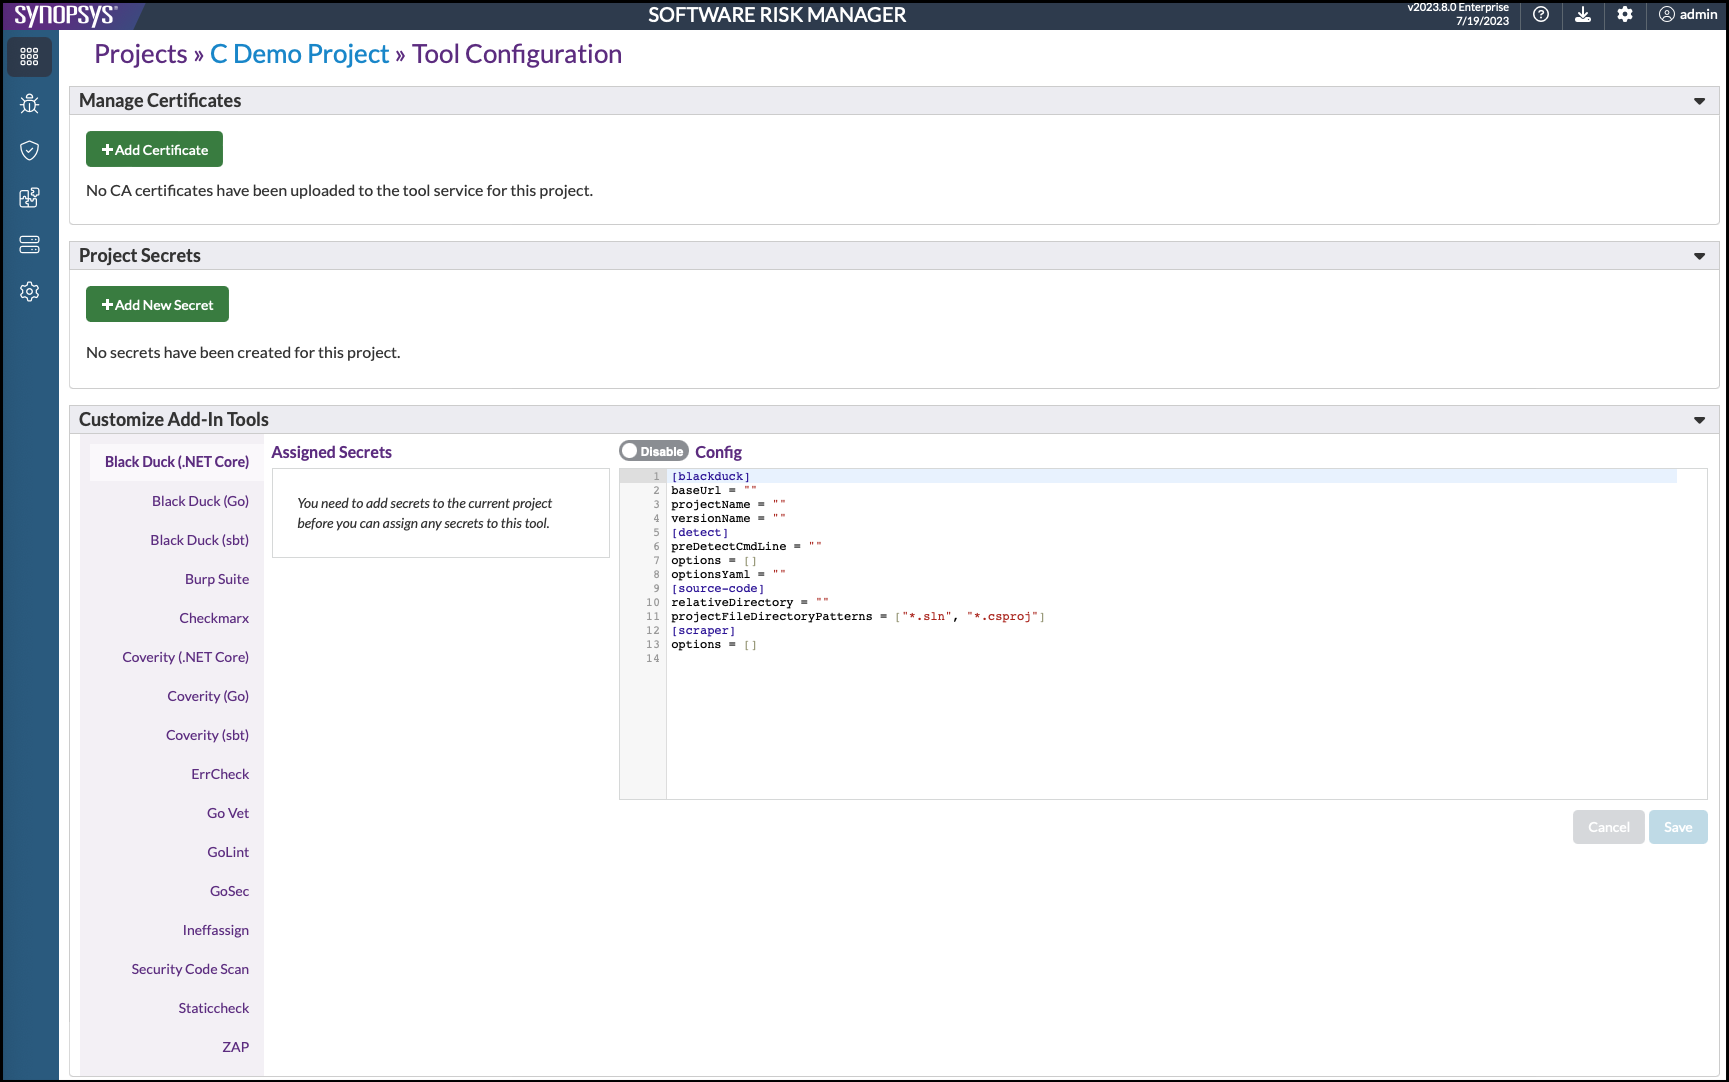
When the Tool Orchestration Service is enabled, the Tool Service Configuration page allows you to configure tool orchestration for an entire Software Risk Manager project.
Click the Projects icon in the navigation bar, then click the project's dropdown configuration icon and select Tool Config.

Manage Certificates
This section allows you to manage a list of certificates that tool orchestration components should trust.
The Manage Certificates section lets a tool or the Tool Orchestration Service handle applications that use a self-signed certificate or a certificate issued by a certificate authority that is not well-known. Click Add Certificate and specify a certificate file to update the list. You will see your certificate in the list after an upload completes. Software Risk Manager will give you the option to overwrite an existing certificate file or cancel your upload if you choose a file that is already in the list. The upload time will appear in the list under each certificate filename to help you manage your certificates.
Deleting a certificate removes it from the list and prevents future access by tool orchestration components. However, removing a certificate will not remove the certificate from any in-progress orchestration-related activity.
Project Secrets
This section allows you to manage data that you can share with one or more tool orchestration components that may require account credentials, keys, or other types of sensitive data.
Click Add New Secret to start generating data for your secret. Specify a name, and click OK to define your list of fields.
To add a field, click Add Field. To add a sensitive field, click Add Sensitive Field. Specify a name for the field, and click OK.
With sensitive data entry, your value is masked as you type, and you must confirm the correct value by entering it twice. Also, sensitive values are write-only and cannot be retrieved from the API of the Tool Orchestration Service. When you have finished specifying fields and field values, click Save to store your secret.
Project secrets get stored as Kubernetes Secrets, so it's recommended that you follow the Kubernetes guidance on encrypting secret data at rest (https://kubernetes.io/docs/tasks/administer-cluster/encrypt-data/).
You can edit field values at any time. Project secrets support limited editing: you cannot change a secret's name, add or remove fields, or change the data entry mode for a field value.
Project secrets are meant to be used with add-in tools, so Software Risk Manager will display a warning icon to highlight those that are not yet assigned to a tool. You can learn about assigning secrets to tools in the Customize Add-In Tools section below.
Customize Add-In Tools
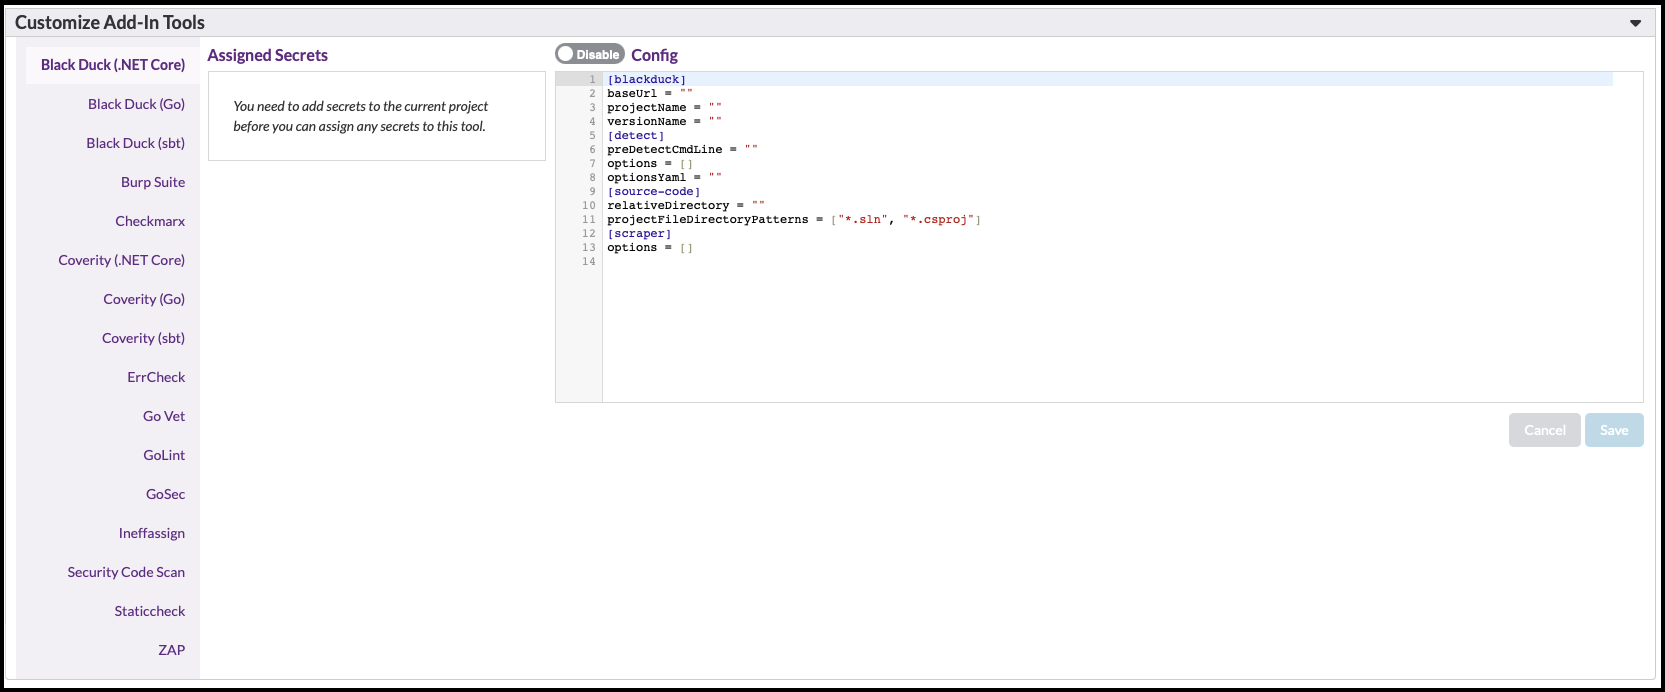
This section lets you customize tools that you previously registered on the Add-In Tool page. Software Risk Manager shows your list of registered tools on the left, and you can select a tool to enable/disable it, assign one or more project secrets, or adjust tool behavior by changing any custom TOML configuration data the tool can read.

What you can customize will vary by tool. For example, the default Security Code Scan tool has no project-specific TOML configuration, and it does not read project secrets, but the Enabled/Disabled toggle lets you customize whether it is available for your project.
Alternatively, the ZAP tool allows you to use project secrets to make authenticated requests during scanning. The interpretation of project secret data is tool dependent—ZAP, for example, will ignore any secrets with missing username or password fields.
The Config box shows any project-specific TOML configuration for the tool you selected.
You should avoid using the Default enabled feature for tools with project-specific TOML configuration unless you have a process for specifying project configuration before a tool runs. Tools with insufficient configuration details typically fail when run.
Remember to click Save to keep changes, and you must save any changes you want to keep before selecting another tool.
Customize Checkmarx Add-In Tool
[checkmarx]
baseUrl = ""
projectId = 0

[scan]
checkScanStatusDelay = 60| Parameter | Description | Example |
|---|---|---|
baseUrl |
The base URL endpoint for the Checkmarx scanner (default="") | "https://cxprivatecloud.checkmarx.net" |
projectId |
The Checkmarx-assigned ID of a project created by the Checkmarx software at the base URL (default=0) | any integer value greater than 0 |
checkScanStatusDelay |
The delay in seconds between requests to fetch scan status (default=60) | 60 |
Note that you may have constant values for both
checkScanStatusDelay and baseUrl, so you
can specify values that will not vary by project.
You must also provide an account credential that authorizes use of the Checkmarx software at the base URL. The Checkmarx Add-In Tool expects to find a project secret named checkmarx-project-credential that includes both a username and a password field. The credential must grant permission to start a new scan in the configured Checkmarx project and to generate a Checkmarx report with scan findings.
Customize ZAP Add-In Tool
The ZAP Add-In has the following project-specific configuration.
[context]
target = ""

[scanOptions]
runActiveScan = false

[reportOptions]
minRiskThreshold = 0
minConfThreshold = 0

[authentication]
type = "none"
loginIndicatorRegex = ""

[formAuthentication]
formURL = ""
formUsernameFieldName = ""
formPasswordFieldName = ""
formAntiCrossSiteRequestForgeryFieldName = ""
formExtraPostData = ""

[scriptAuthentication]
authenticationScriptContent = ""
Use the Customize Add-In Tools feature to specify values for the above configuration before enabling the tool. Refer to the following table for an explanation of the configuration parameters.
| Parameter | Description | Example |
|---|---|---|
| target | The URL where the scan starts (default="") | the ZEST script for script authentication (default="") |
| runActiveScan | The decision to run an active scan (default=false) | true |
| minRiskThreshold | The minimum risk code for ZAP report findings (default=0) | 1 |
| minConfThreshold | The minimum confidence for ZAP report findings (default=0) | 1 |
| type | The authentication type: none, formAuthentication, or scriptAuthentication (default=none) | formAuthentication |
| loginIndicatorRegex | The regex to indicate a successful login request (default="") | '\QSet-Cookie: .AspNetCore.Identity.Application=\E' |
| formURL | The URL of the login form for forms authentication (default="") | "http://host.docker.internal/contosou/account/login" |
| formUsernameFieldName | The login form's username field name (default="") | "Email" |
| formPasswordFieldName | The login form's password field name (default="") | "Password" |
| formAntiCrossSiteRequestForgeryFieldName | The anti-XSRF token field name (default="") | "__RequestVerificationToken" |
| formExtraPostData | The extra data to include with login request (default="") | "RememberMe=false" |
| authenticationScriptContent | The ZEST script for script authentication (default="") | See ZAP documentation |
When you have ZAP authentication configured, you can provide account credentials by creating project secrets that include both a username and a password field. The ZAP scanner will send authenticated requests using each credential it finds. Be sure to specify the correct username and password with each credential so that ZAP can log on successfully.
