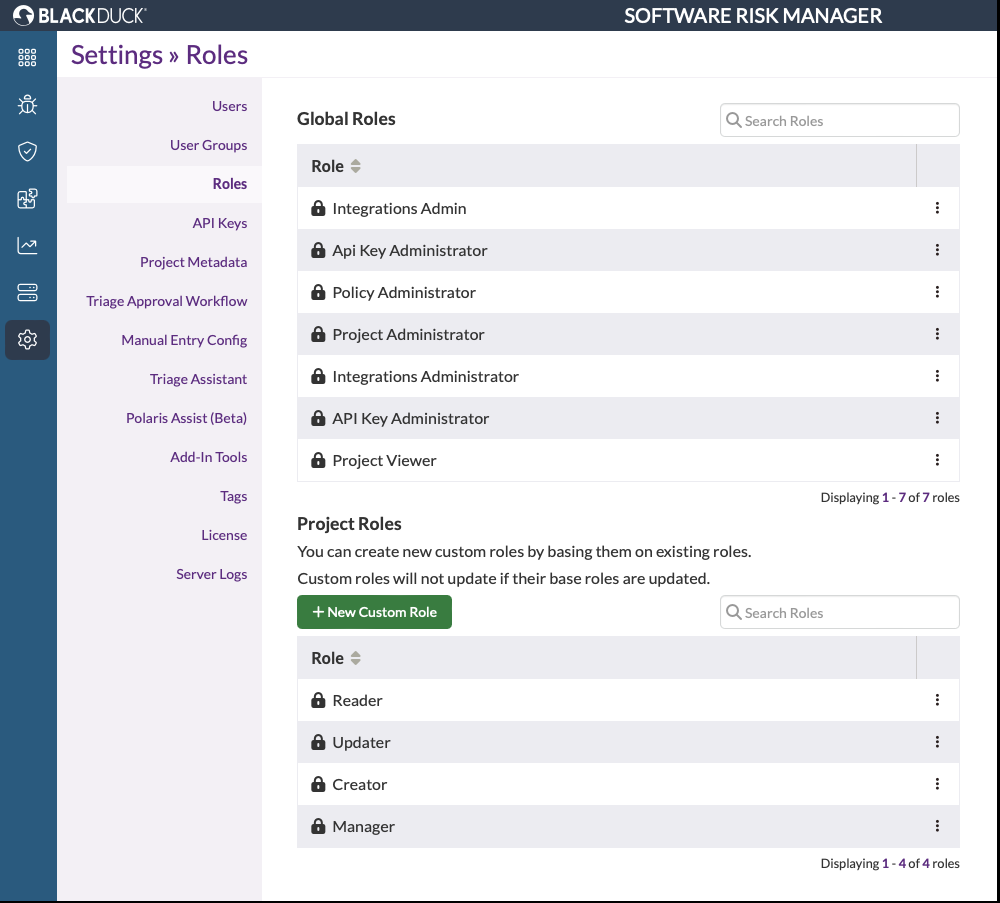
Roles enable users to interact with SRM in ways permitted by the set of permissions
included in their definition. Role definitions can be viewed, edited, and created on the
Roles page.
Click the Settings icon in the navigation bar and select Roles from the left menu to open the
Roles page.
This page displays both Global Roles and Project Roles. SRM comes preconfigured with a
collection of built-in roles, each of which is denoted by a padlock symbol next to its
name.
Built-in roles can only be viewed, while all other roles can be edited, deleted, and
replaced. Only custom project roles can be created.
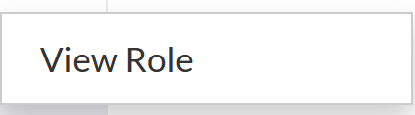
View Role
A built-in role's name and its set of associated permissions can be viewed on the
Roles page.
To view a role's definition:
Click the Settings icon in the navigation bar and select Roles from the left
menu.
Open the context menu for the role and select the View Role option. This opens the View Role window.
Review the role's name and its set of associated permissions.
Click Done.
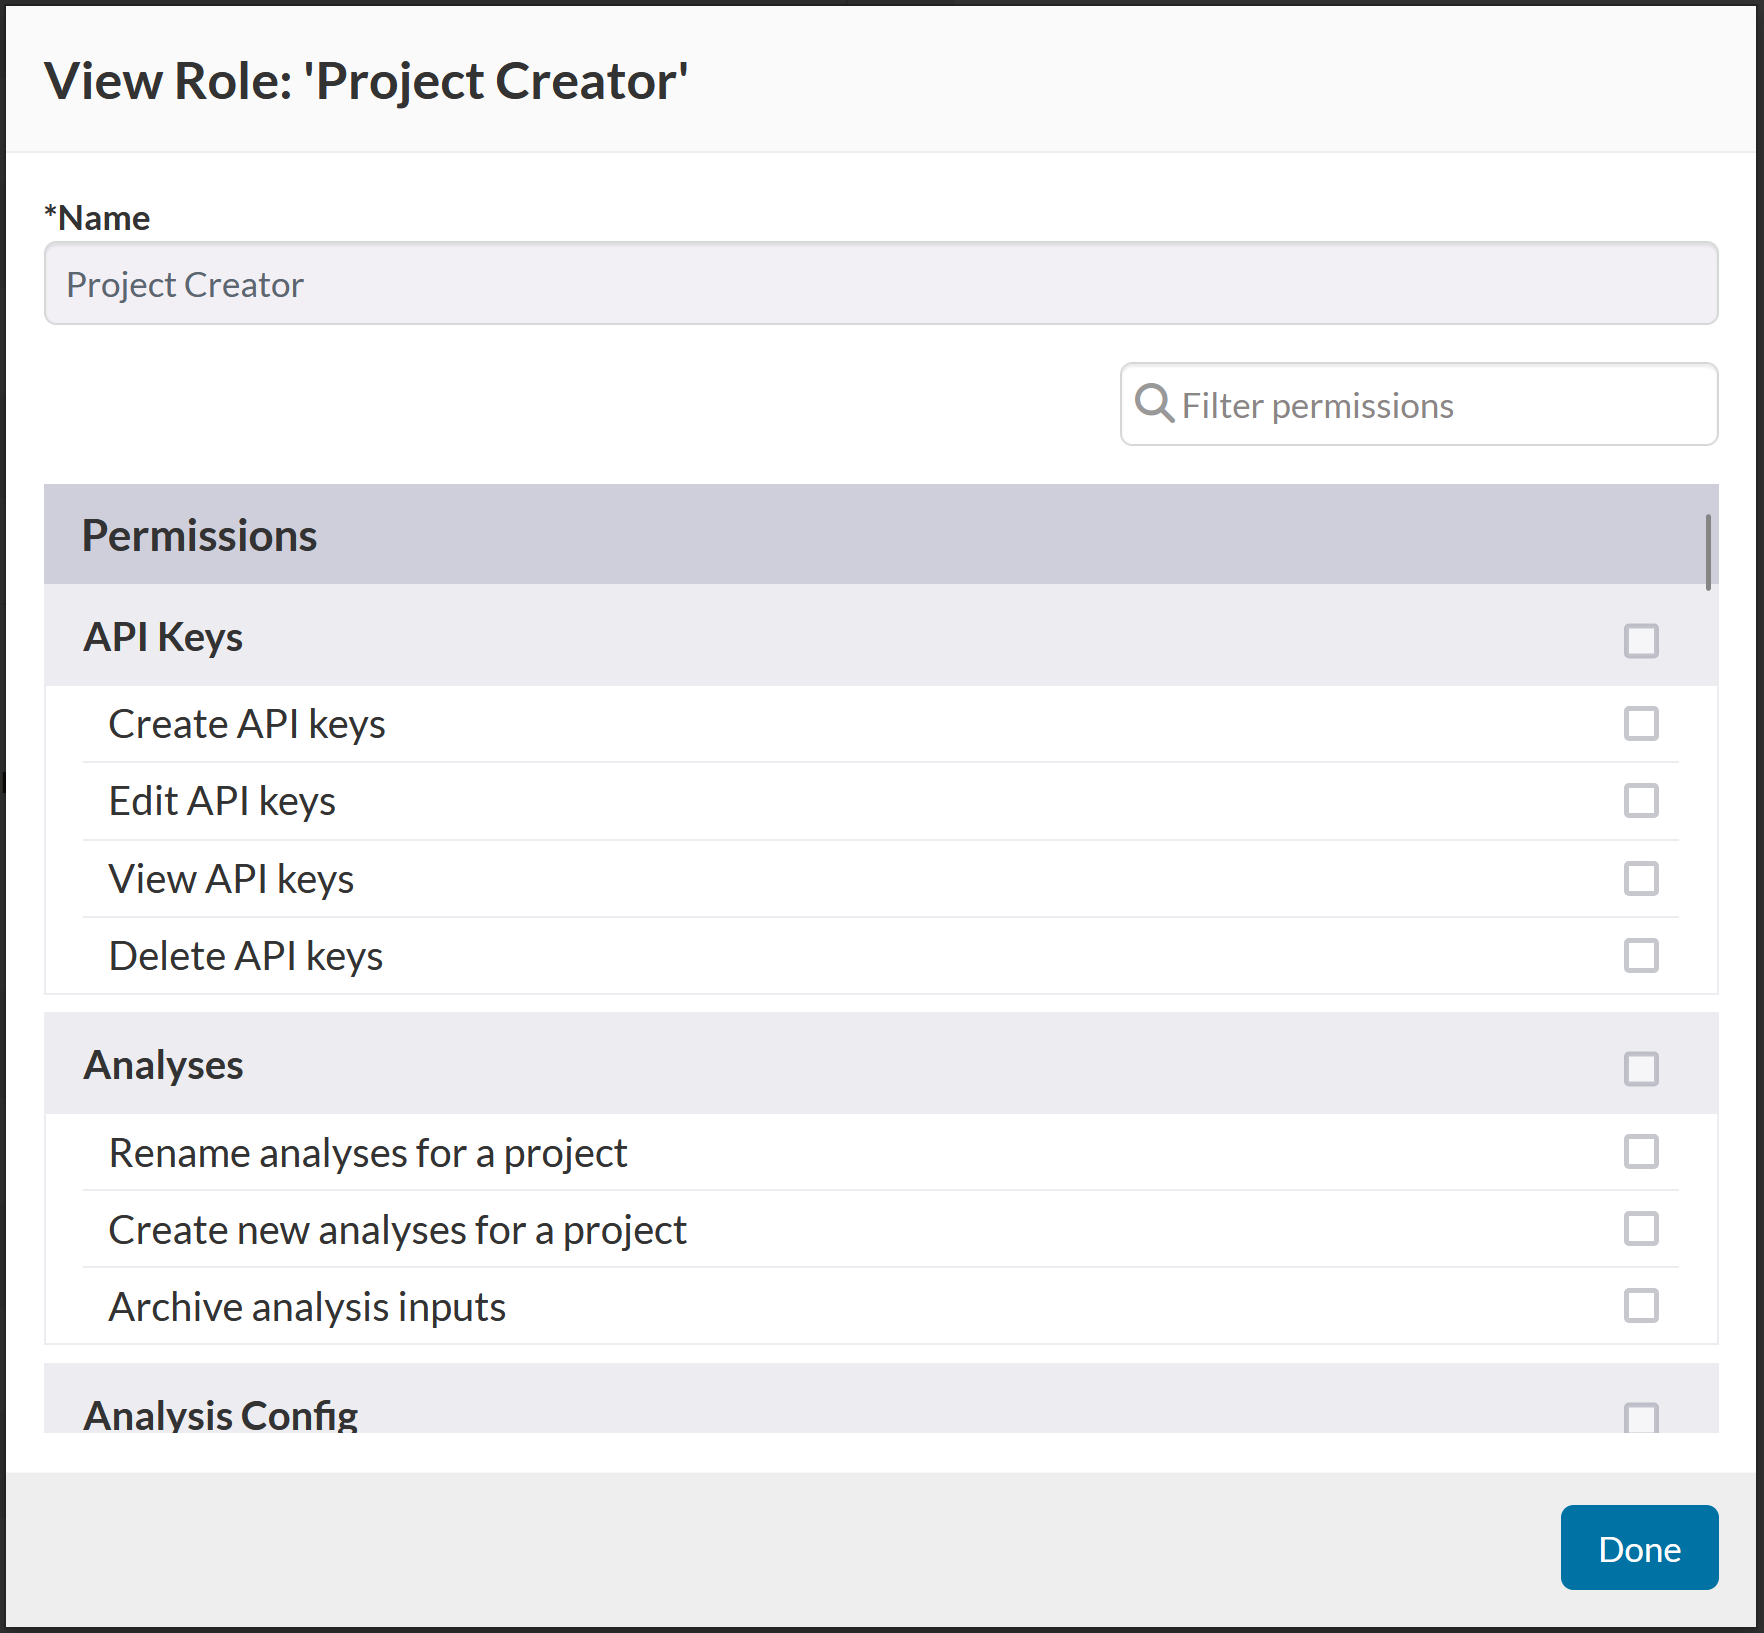
Edit Role
A custom project role's name and its associated set of permissions can be edited on
the Roles page.
To edit a custom project role's definition:
Click the Settings icon in the navigation bar and select Roles from the left
menu.
Open the context menu for the role and select the Edit Role option. This opens the 'Edit Role' window.
Review the role's name and set of associated permissions and make changes as
necessary.
Note: Role names are unique. An error will be presented in the
event that a role's name is changed to one that already
exists.
To save the changes made, click Save, otherwise click Cancel to discard
them.
Delete Role
Custom project roles can be deleted on the Roles page.
To delete a custom project role:
Click the Settings icon in the navigation bar and select Roles from the left
menu.
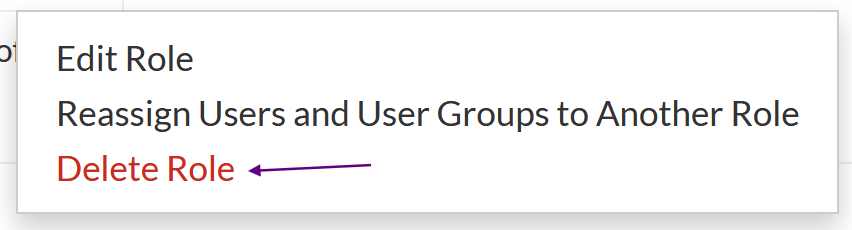
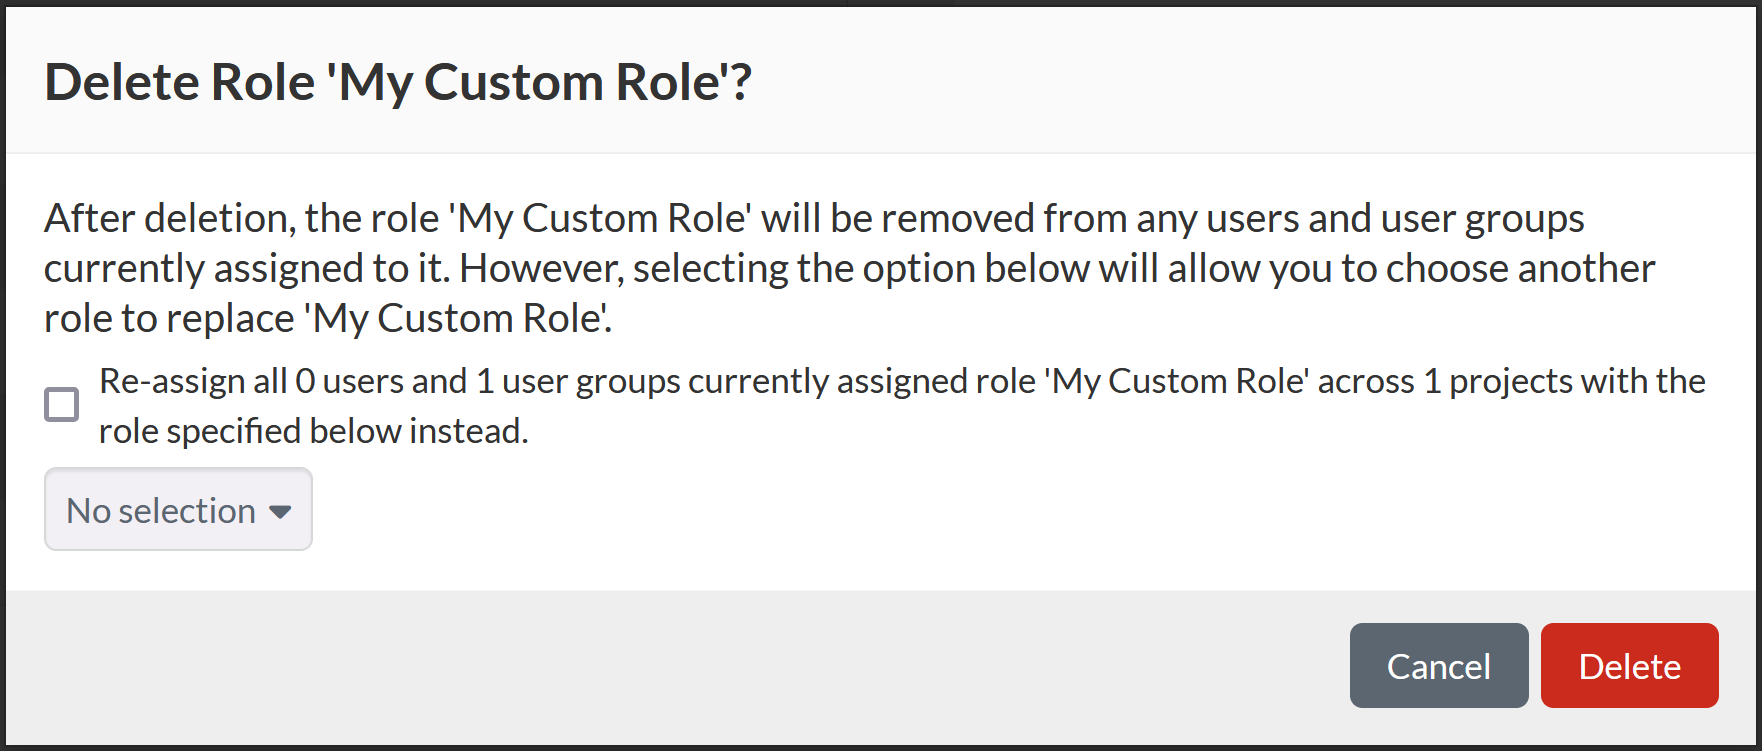
Open the context menu for the role and select the Delete Role option. This opens the Delete Role window.
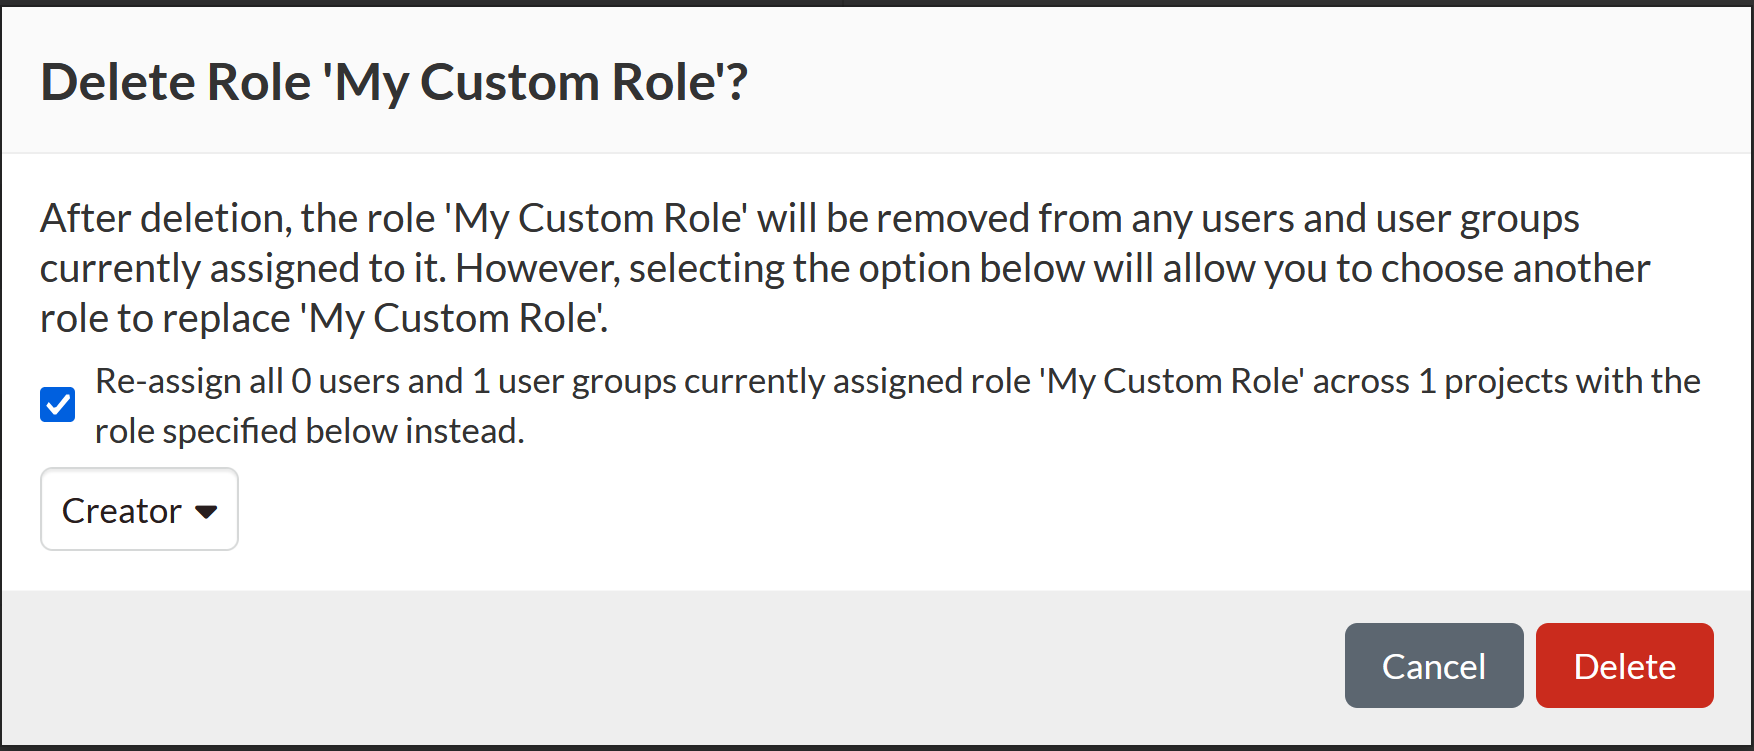
If the role to be deleted has been assigned to users or user groups, a
replacement can be selected by checking the "Reassign all..." checkbox and
then selecting a replacement role.
To delete the role, click Delete, otherwise click Cancel.
Replace Role Assignments
On the Roles page, users and user groups who have been assigned a role can have their
assignment replaced with a different role.
To reassign users and user groups who have been assigned a role with a different role:
Click the Settings icon in the navigation bar and select Roles from the left
menu.
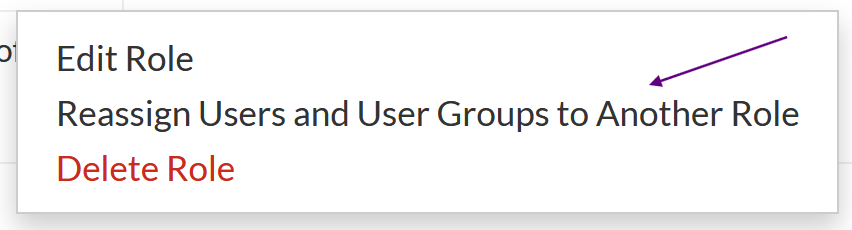
Open the context menu for the role and select the "Reassign Users and User
Groups to Another Role."
Note: The "Reassign Users and User Groups to
Another Role" context menu option will be disabled if the role is not
assigned to an users or user groups.
This opens the Replace Role window.
Select a replacement role.
To reassign users and user groups to the selected replacement role, click
Replace, otherwise click Cancel.
Create Custom Project Roles
Custom project roles can be created on the Roles page.
To create a custom project role:
Click the Settings icon in the navigation bar and select Roles from the left
menu.
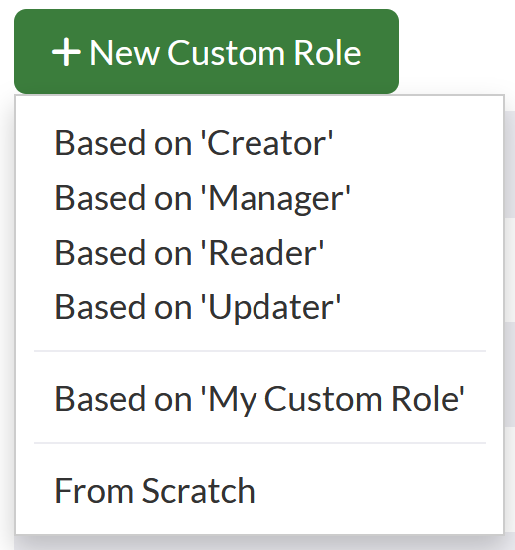
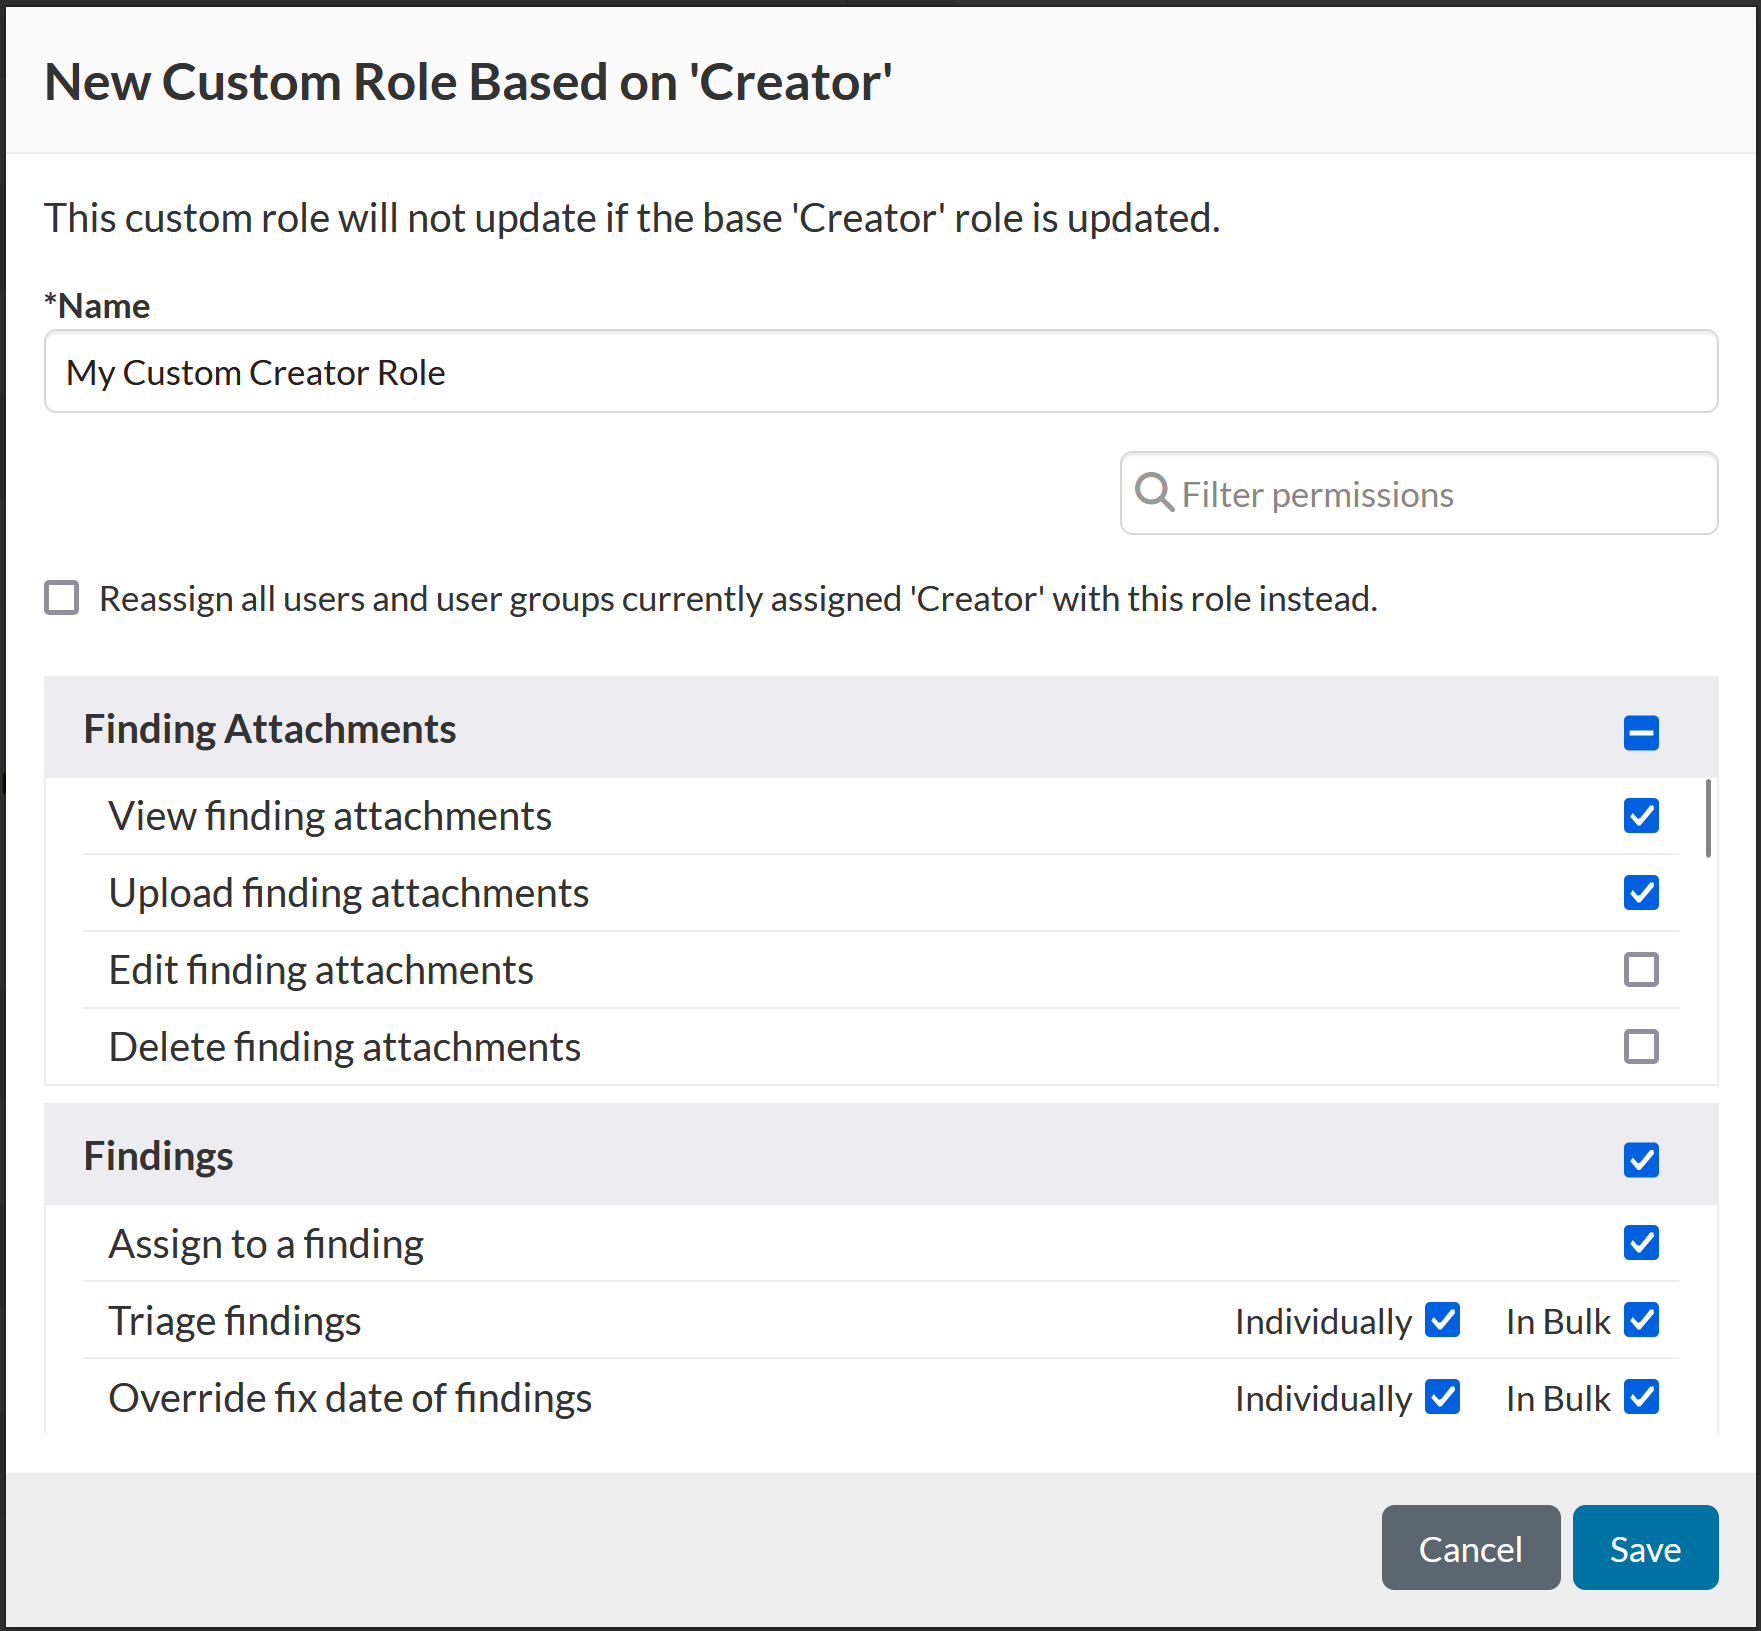
Click on the New Custom Role button in the Project Roles section of the
Roles page and choose to base the new role on an existing one or to build
the new role from scratch. This opens the New Custom Role window.
Name the custom role and select any number of permissions.
Note: Role names
are unique. An error will be presented in the event that a role is
attempted to be created with a name that already exists.
To create the new custom role, click Save, otherwise click Cancel.
For more information on how to assign roles, see the following topics: