
Managing User Groups
To simplify user administration, users can be managed as groups. Roles and permissions assigned to a group will apply to every member of that group. Admins can set up multiple groups with multiple permissions, including nested groups.
Click the Settings icon in the navigation bar and select User Groups from the left menu to open the User Groups page.
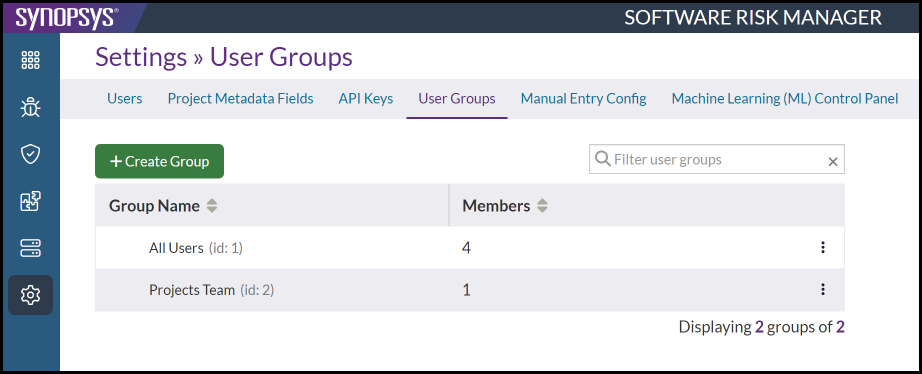
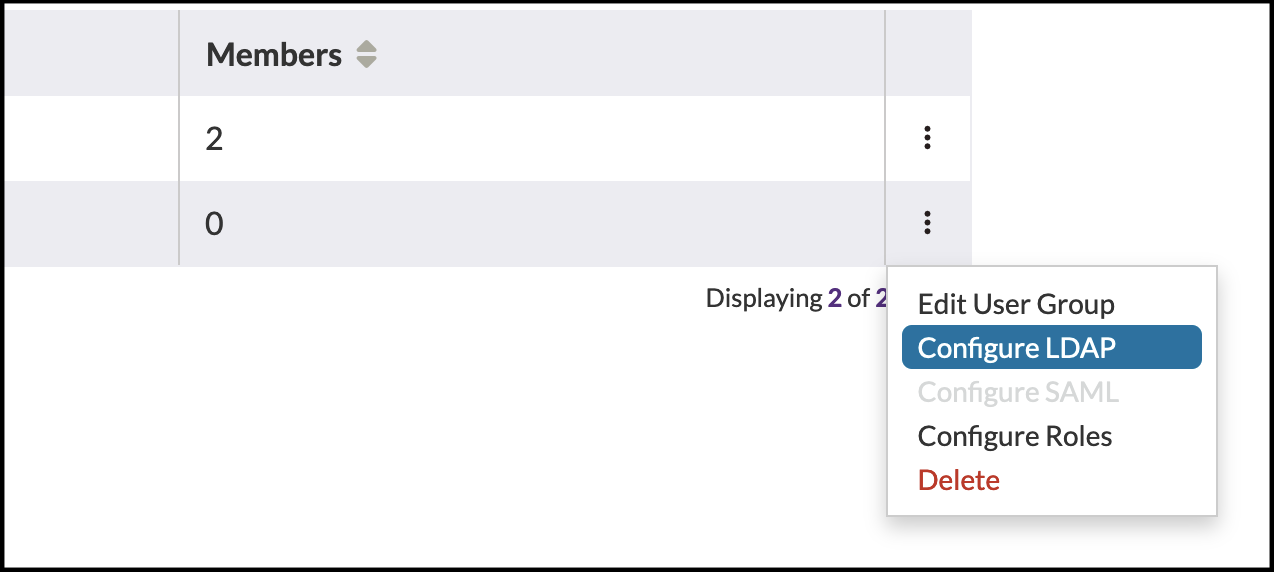
The User Groups page shows a list of existing groups and the number of members in each. Clicking the column headers will re-sort the list.
Viewing Existing User Groups
- Click the Settings icon in the navigation bar and select User Groups from
the left menu.
This page shows a list of existing groups and the number of members in each.
- Use the filter field to search for a specific user group or click the column header to re-sort the list.
Creating a User Group
In addition to single groups, groups can be nested ("parent" group).
- Click the Settings icon in the navigation bar and select User Groups from
the left menu.
- Click Create Group.
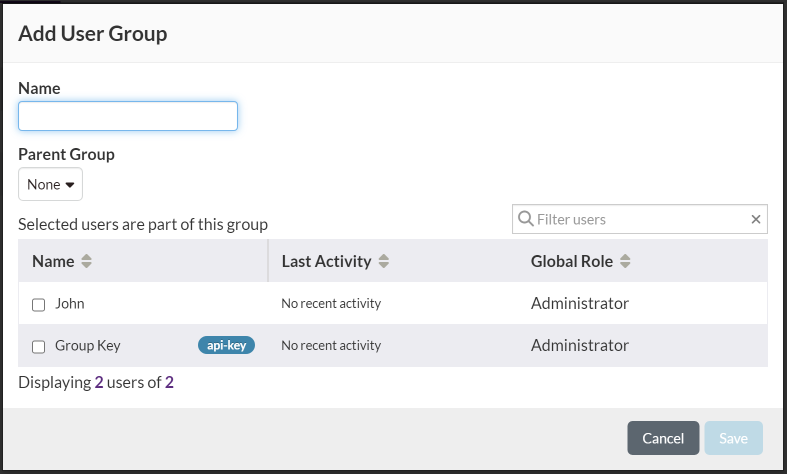
- Enter a group name and select group members from the list.
- (Optional) Select a "Parent Group" to create a nested group.
- Click Save.
Configuring User Group Roles
Assigning roles to a group will apply those roles to every member of that group. However, roles assigned to members in the group will not replace or overwrite the roles assigned individually to a user.
- Click the Settings icon in the navigation bar and select User Groups from
the left menu.
- Click the dropdown configuration icon and select Configure Roles.
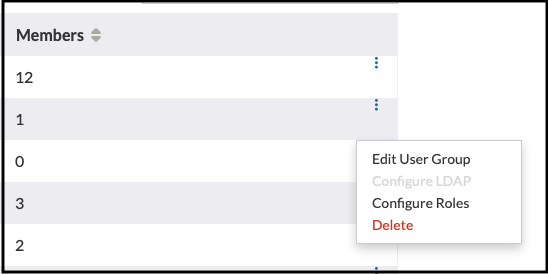
This opens the Configure Roles window.

- Make the necessary configuration changes.
- Click Done.
Editing User Group Settings
Editing group settings includes changing the group name, reassigning the parent group, and adding or removing users.
- Click the Settings icon in the navigation bar and select User Groups from
the left menu.
- Click the dropdown configuration icon and select Edit Group Settings.
This opens the Edit User Group window.
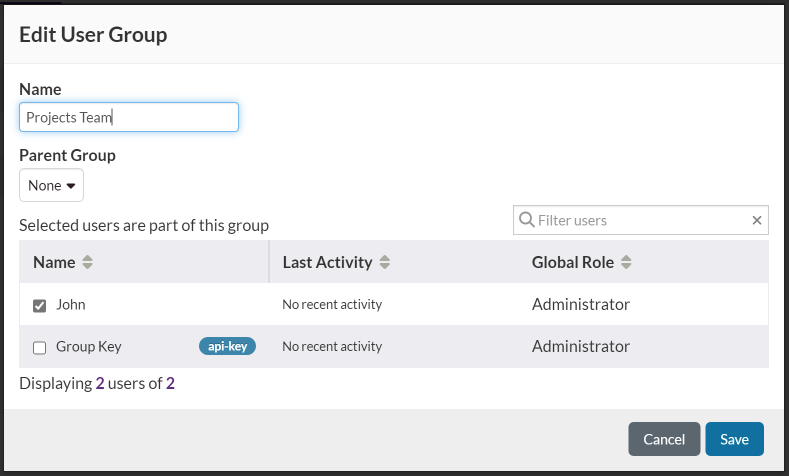
- Make the necessary changes.
Use the filter field to search for individual users or click the column headers to re-sort the list.
- Click Save.
Deleting a User Group
Deleting a user group will not delete individual users or remove any roles previously assigned to a user individually
- Click the Settings icon in the navigation bar and select User Groups from
the left menu.
- Click the dropdown configuration icon and select Delete Group.
This opens the Confirm Delete window.
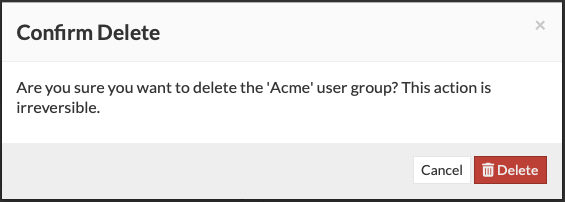
- Click Delete to confirm.
Configuring LDAP for User Groups
This feature may be presented when LDAP is configured but is only compatible with providers that create a user attribute containing group membership for SRM to check, such as Active Directory.
From here, you can enter a comma-separated list of LDAP group names.
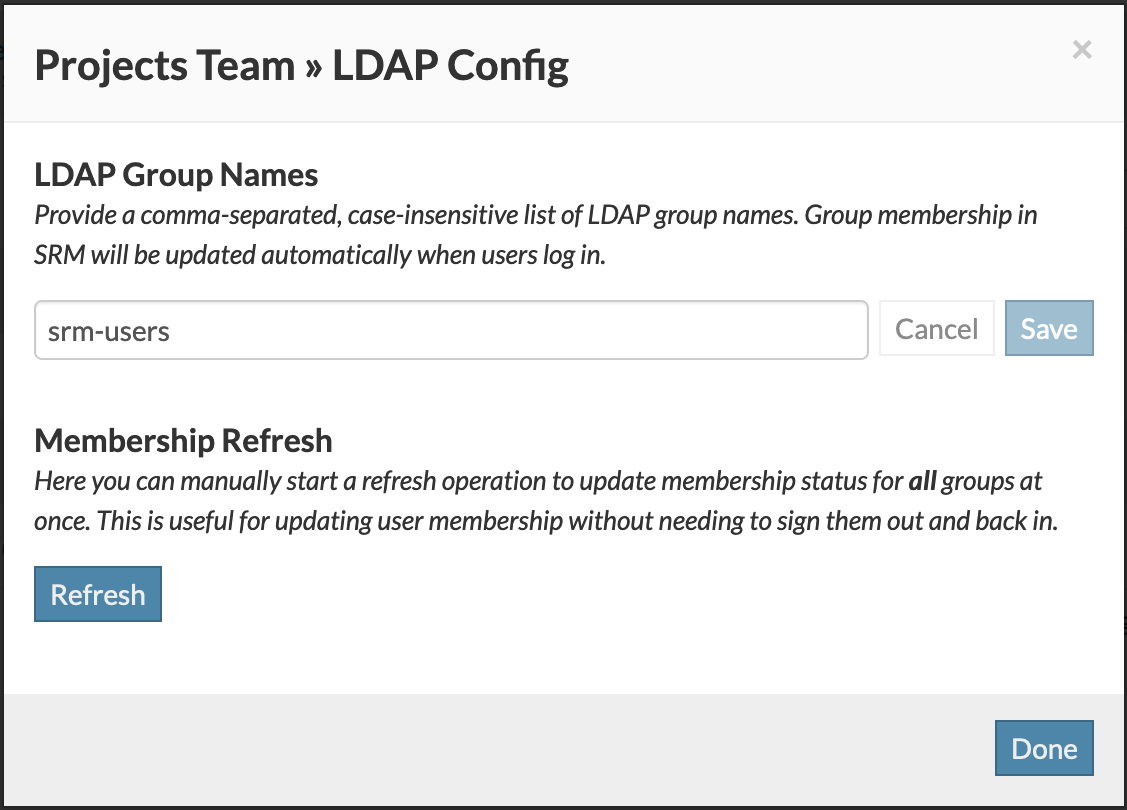
The names for your LDAP groups are pulled from the DN path attribute specified in the SRM properties file. For more information, see LDAP group mapping in the SRM Install Guide.
When an LDAP user signs in, their LDAP groups will be checked against your mappings configured on this page. The user will be added to the SRM group if they are a member of any of the listed LDAP groups; otherwise, they will be removed.
If users are added or removed from an LDAP group, their membership will not be updated until they sign out and back in. You can force a manual refresh of all group's LDAP members by clicking the "Refresh" button on this page.