Adding an AppSec Testing Tool
- Implement a command/script/application that automates a tool.
- Package the capability into a Docker image that can be invoked from a Bourne shell.
- Define a scan request file, specifying (at a minimum) the key values of the Software Risk Manager request table.
- Register the add-in tool.
- Enable the tool for specific projects, configuring any project-specific key values defined in the scan request file.
This walkthrough will show you how to create, register, and enable an add-in tool that automates Security Code Scan, a static code analysis tool for .NET. The Security Code Scan add-in tool is automatically installed when you enable the Software Risk Manager Tool Orchestration feature, but you can use this walkthrough to learn how to add a new add-in tool whose output must be transformed to the Software Risk Manager XML Schema.
Tool Automation
Your first task will be to create a PowerShell Core script that can automate Security Code Scan. We will use a script that defines two parameters: a path to an input archive containing C# source and a path to an output file with findings that Software Risk Manager can ingest.
- Unpack the source code in the input file provided by Software Risk Manager.
- Add the SecurityCodeScan.VS2017 project reference to each source code project file.
- Run dotnet build.
- Translate the findings from the build results into the generic SRM XML format.
The last step is required because Software Risk Manager does not support ingesting Security Code Scan findings directly. If you were automating Checkmarx, a tool whose output Software Risk Manager can read, then Step 4 would be unnecessary. You will handle Step 4 with a separate script, so download SecurityCodeScan-Results.ps1 to your SecurityCodeScan directory.
Tool Packaging
To package the Security Code Scan automation, you must create a Docker image capable
of running both PowerShell Core scripts and compilations of .NET Core 2 code. Adding
PowerShell Core to a Docker image based on microsoft/dotnet:2.2-sdk
creates a suitable environment.
docker build -t codedx-securitycodescanrunner:v1.0 -f ./Dockerfile.txt .Scan Request File
codedx-securitycodescanrunner:v1.0 that contains the
SecurityCodeScanner.ps1 script in the
/opt/codedx/securitycodescan directory. The following scan
request file content describes how to run SecurityCodeScanner.ps1 on an input
provided by Software Risk
Manager.[request]
imageName = "codedx-securitycodescanrunner:v1.0"
workDirectory = "/opt/codedx/securitycodescan/work"
shellCmd = '''
source=$(ls /opt/codedx/securitycodescan/work/input)
pwsh /opt/codedx/securitycodescan/script/SecurityCodeScan.ps1 \
"/opt/codedx/securitycodescan/work/input/$source" \
/opt/codedx/securitycodescan/work/output/securitycodescan.output.xml
'''
resultFilePath = "/opt/codedx/securitycodescan/work/output/securitycodescan.output.xml"
securityActivities = ['sast']The value of the imageName key is
codedx-securitycodescanrunner:v1.0, the Docker image you created.
The workDirectory key value is /opt/codedx/securitycodescan/work, a directory that
already exists because your Dockerfile established a
/opt/codedx/securitycodescan/work/output directory to store the result from
SecurityCodeScan.ps1. Software Risk Manager uses the work directory to store add-in
tool data.
The shellCmd key value is the Bourne shell script Software Risk Manager will run to
invoke your add-in tool. SecurityCodeScan.ps1 requires two parameters: an analysis
input file and an output file. Software Risk Manager puts the analysis input file in
the input directory, which is a sub-directory of the work directory. The analysis
input file parameter will come from a search of that directory, and the output file
will be
/opt/codedx/securitycodescan/work/output/securitycodescan.output.xml.
The value of the resultFilePath key directs Software Risk Manager to the add-in tool
output and will match the script's output file parameter.
securityActivities is used to define the add-in tool type
for use in Intelligent Orchestration implementations.Software Risk Manager Registration
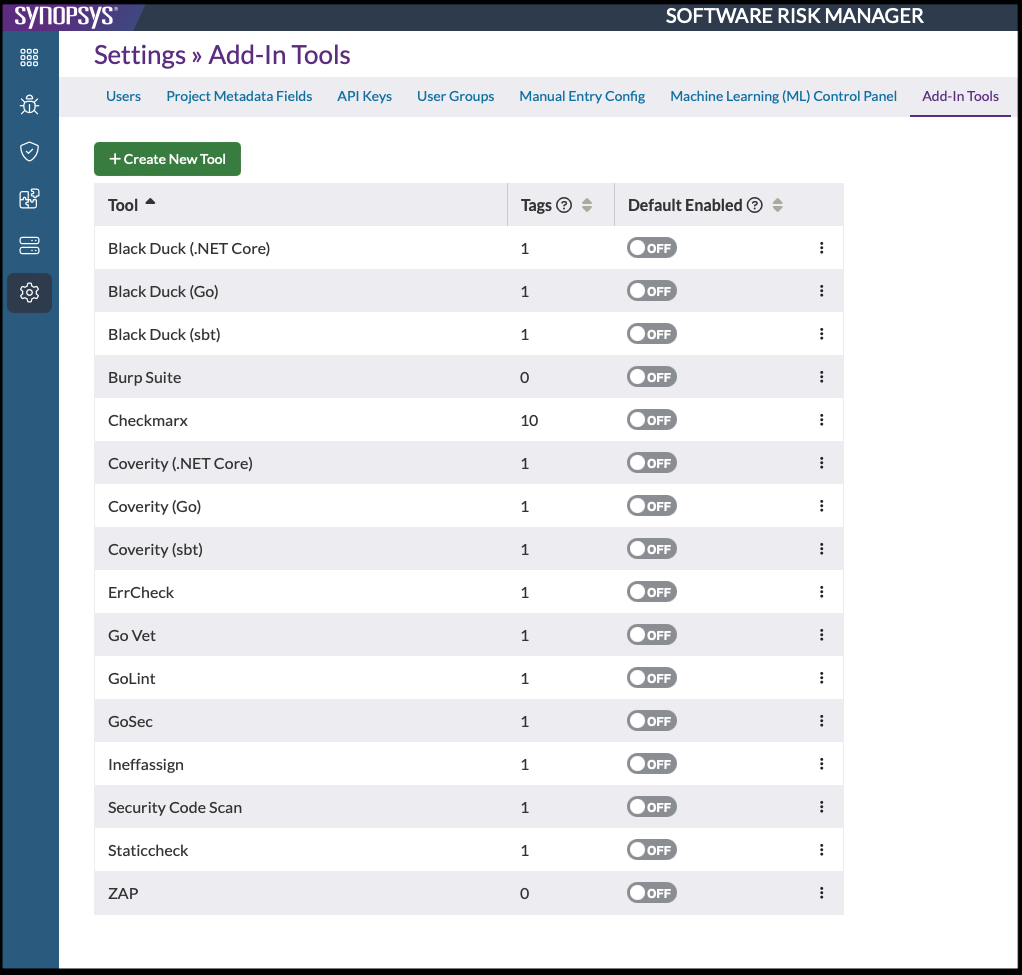
Registering your add-in tool with Software Risk Manager is the next step. Log on to Software Risk Manager as an administrator, click the Settings icon in the navigation bar, then select Add-In Tools from the left menu.

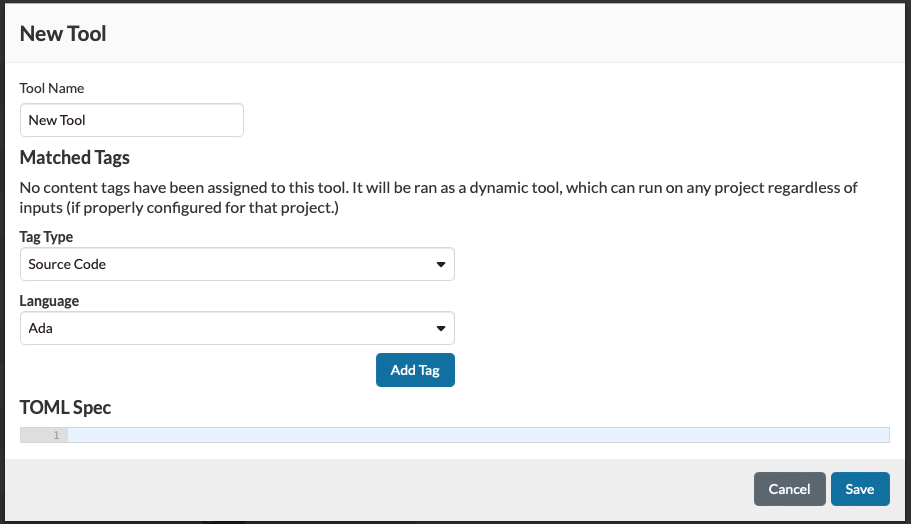
Click Create New Tool to open the Add-In Tool Registration window.

Click the New Tool label in the window title area, replace the text with a meaningful name, like Security Code Scan, if that name is not in use, and click OK.
Security Code Scan is a SAST tool requiring an analysis input, so you must associate your add-in tool with one or more types of content that Software Risk Manager can detect. Select Source Code for Tag type, C# for Language, and click Add Tag so that Software Risk Manager will offer to run Security Code Scan whenever it detects an analysis input file containing C# source. Lastly, specify the contents of your scan request file in the TOML Spec section. Click Done to save your add-in tool registration.
Enable Add-In Tool
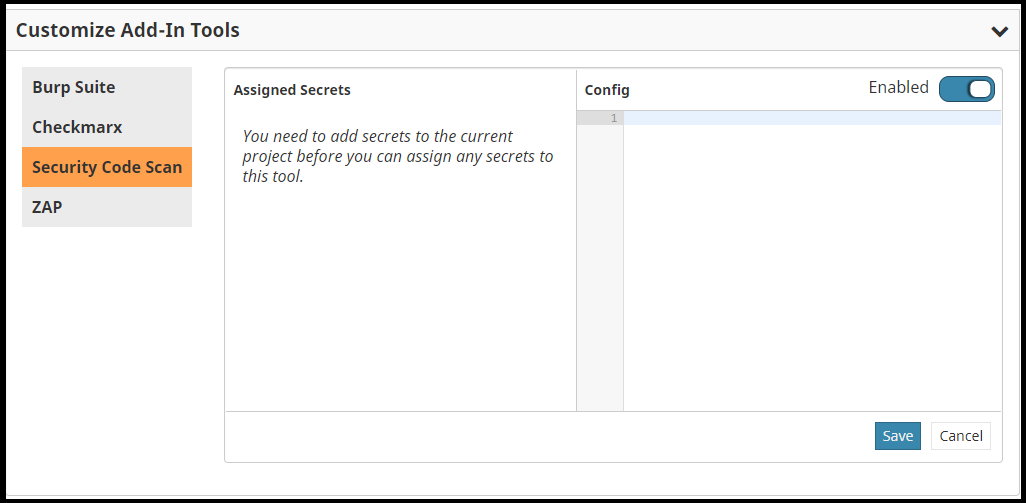
Your add-in tool is now registered in a disabled state. To enable your add-in tool for a specific project, open the Tool Service Configuration page, find your add-in tool in the Customized Add-In Tools section, toggle the Disabled/Enabled switch to enabled, and click Save. You can also use the Default enabled toggle to enable a tool for every project, excluding those where it was explicitly disabled.
Below the Disabled/Enabled toggle is a box where you could edit any
project-specific TOML content, which is scan request file content outside the
request section (Security Code Scan has none).

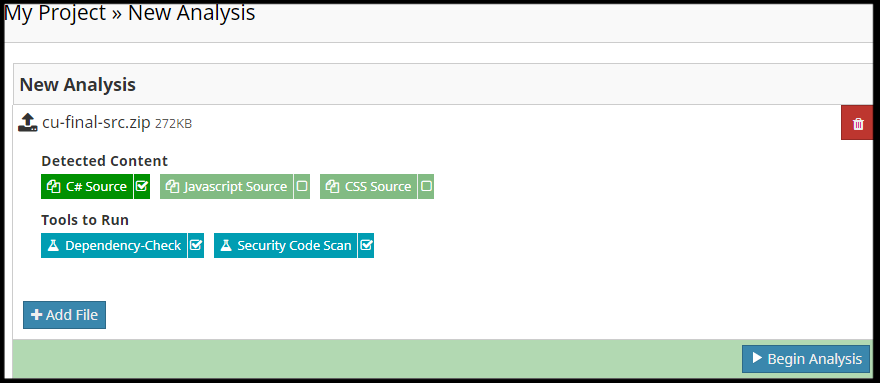
Software Risk Manager will offer to run enabled add-in tools whenever it detects an analysis input containing C# source code in the project where you enabled the add-in.

Users will have the option to deselect your add-in tool when they start a new analysis. For example, Software Risk Manager does not distinguish between C# source code for .NET Core and .NET Framework, and since your add-in tool runs on Linux, it supports .NET Core code only. A user configuring a new analysis with .NET Framework source code (not .NET Core source code) could deselect your add-in tool in that case.
