Configuration
After installing the plugin, the next step is to add a Software Risk Manager Scan Task to your project. Navigate to the "Edit Build Tasks" page for a job for your project and click the "Add task" button. After selecting the "Code Dx Scan Task" option, the configuration fields will display.
Publishing
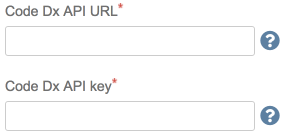
The Code Dx URL, API key, and Project fields are required for
publishing. Ask your administrator to generate an API key
that has the create
role for the project it needs to interact with.
The first thing that should be set up are the Software Risk Manager Server Settings.

Self-signed certificates can also be set up here. If using self-signed certificates, please refer to the section on self-signed certificates. Otherwise, the field may be left blank.
Once the Code Dx URL and API key fields are populated, Click the Refresh Projects button next to the Project dropdown.

This will populate the list with the Software Risk Manager projects available to the given API key.
The Source and Binary Files field allows you to identify the files in the job workspace for Software Risk Manager to analyze. The format of this field is a comma-separated list of Ant glob file location patterns. You can populate this list by specifying the files (relative to the workspace) that will be sent to Software Risk Manager.

The Excluded Source and Binary Files field allows you to specify files to omit in the source and binaries zip file that is uploaded to Software Risk Manager. Ant glob file location patterns are also supported.

Software Risk Manager supports importing the results of more than 70 commercial and open source analysis tools, in addition to generic listing formats. This feature is supported in the Bamboo plugin via the Tool Output Files field, where you specify a comma-separated list of paths and filenames of each output file.

The Analysis Name field allows you to name the analyses performed by Bamboo.
You can find the analysis names on the "First Seen by SRM" and "Last Modified"
filters on Software Risk Manager's Findings page. You can use build/environment
variables to construct a different name for each analysis. For example,
Build #${bamboo.buildNumber} creates analysis name "Build #26"
for the 26th build of the project. For information on what environment variables are
available, see Bamboo variables.

Handling a Self-Signed Certificate in Bamboo
If the server hosting Software Risk Manager is using a self-signed certificate, you'll have to do some configuration or the connection to Software Risk Manager will be refused:

Bamboo needs to know that your Software Risk Manager server is trusted. Populate the Self-Signed Certificate Fingerprint field with the SHA1 fingerprint of the self-signed certificate used by the Software Risk Manager server. Contact your Software Risk Manager administrator for the correct value. You may also navigate to your installation of Software Risk Manager in a browser, and obtain the fingerprint by following the instructions for your particular browser:
Chrome: Click the lock icon next to the URL, choose the Connection tab and follow the link for "Certificate Information". Expand the "Details" section; the SHA1 fingerprint is near the bottom.
Firefox: Click the lock icon next to the URL, choose the Security tab, and click the View Certificate button. The SHA1 Fingerprint should be at the bottom of the resulting window.
Safari: Click the lock icon next to the URL, click Show Certificate, expand the Details section, and the SHA1 Fingerprint can be found near the bottom.
Internet Explorer: Click on the Certificate Error text to the right of the URL, select the Details tab, and find Thumbprint and Thumbprint algorithm fields. Ensure that the value of the Thumbprint algorithm field is "sha1" and use the value of the Thumbprint field.
Once you have the correct fingerprint, populating the Self-Signed Certificate Fingerprint field will allow you to proceed.
Waiting for Analysis Results
When performing an analysis, the Bamboo build task will zip up the specified workspace files and send them to the Software Risk Manager server. By default, Bamboo will not wait for the results of the analysis.
In some cases, you will want to wait for the analysis to complete so you may consider the Bamboo build a success or failure.

Upon enabling this option, the fields below will appear.

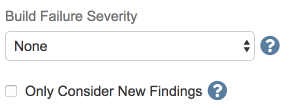
The Build Failure Severity field allows you to have the build marked as "failed" if Software Risk Manager reports your project contains findings that match the chosen option. This field is defaulted to "None" and the build step will finish upon successfully uploading all files to Software Risk Manager. If a different option is selected, the build step will not finish until the analysis is complete.

The Only Consider New Findings option, when checked, means that the build will only be marked as failed if new findings that match the Build Failure Severity option are reported.

Software Risk Manager Server Defaults
If your team uses one Software Risk Manager server for multiple projects, it may be
worth setting up defaults for that server. This will make it easier in the future to
create new Bamboo tasks that publish to that server. You may set defaults by
clicking on the Code Dx Plugin link in the ADD-ONS
section of the Bamboo administration.

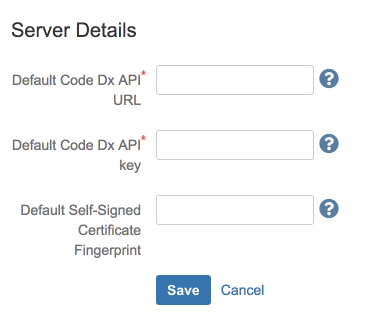
Here, you may set defaults for the Software Risk Manager URL, API key, and optionally the self-signed certificate fingerprint.
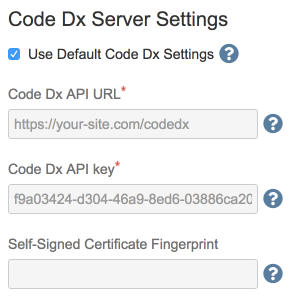
Once configured, you may opt to use the default server in your task configuration.

